
Project Overview
Location: Brunswick, Melbourne VIC
Home: 1970s weatherboard, 2 bedrooms
Family: Marcus, lives alone, plans to sell in 3–5 years
Scope: Full main bathroom strip-out and rebuild, same footprint
Timeline: 4 weeks, completed February 2026
Marcus bought his weatherboard as a long-term hold with a medium-term exit plan: live in it, improve it, sell it. The bathroom was the room dragging the whole house down — original 1970s everything, from the avocado-adjacent basin to the shower recess with grout you could write your name in. His brief had one eye on daily comfort and one on resale: “Make it feel like 2026, not 1976, and don’t do anything a buyer would want to rip out.”
📌 Illustrative Example: This case study is an illustrative example created to demonstrate renovation possibilities, costs, and design ideas. Names, quotes, and specific details are fictional and intended for inspiration only.
The Challenge
Small bathrooms punish bad layouts, and this one — 2.4 × 2.1m — had all of them. The door swung straight into the vanity. The shower was a cramped 900mm square boxed into the far corner with a shower curtain that stuck to you. The single vanity basin meant no bench space at all, and the mirror was postage-stamp sized. Ventilation was a noisy exhaust fan that sounded like a lawnmower and moved about as much air.
Underneath the cosmetic problems sat the real risk: the waterproofing membrane was original, and in a 50-year-old bathroom that’s a leak waiting to happen. Marcus’s tiler found soft spots in the particleboard floor around the shower during demolition — caught in time, but exactly the kind of thing that turns a $25,000 renovation into a $40,000 structural repair if ignored.
[BEFORE IMAGE PLACEHOLDER]The Solution
The footprint didn’t change — every fixture stayed roughly where it was, which kept plumbing costs sane. The transformation came from rethinking how the 5 square metres were used.
Key changes:
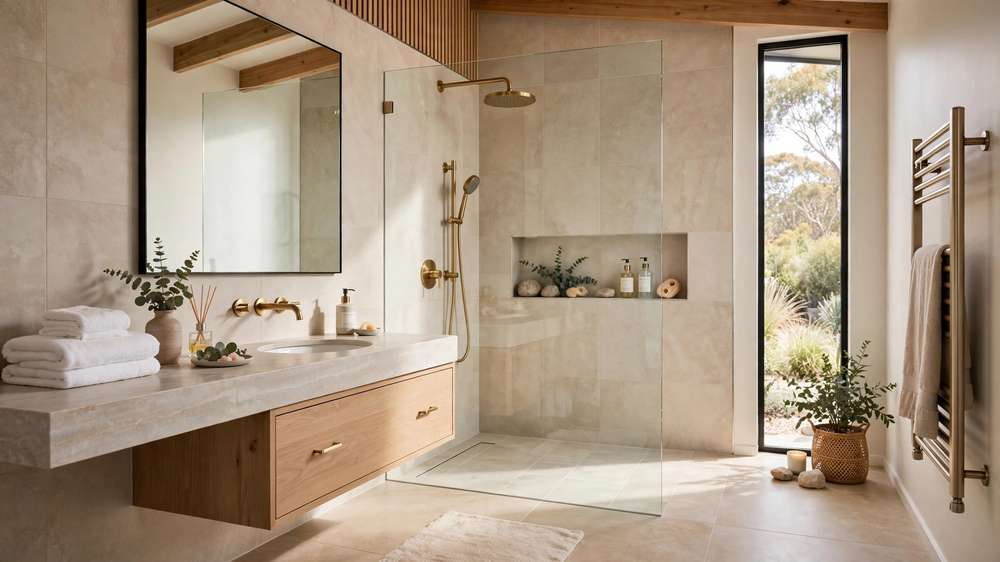
– Layout: The door was rehung to swing the other way, instantly freeing the vanity wall. The shower grew to 1200 × 900mm with a frameless glass panel instead of a curtain, which made the room feel twice as wide.
– Vanity: A 1200mm wall-hung double vanity replaced the single pedestal basin. Wall-hung means the floor tiles run underneath — visually, the room gains floor area it doesn’t actually have. Two basins, two sets of drawers, one happy future buyer.
– Tiles: Large-format 600 × 600mm porcelain on the floor (fewer grout lines = easier cleaning and a bigger-room illusion) with a feature wall of handmade-look kit-kat tiles behind the vanity in warm white.
– Bath: A 1500mm freestanding bath replaced the old inset tub. In a small room this sounds mad, but the freestanding profile with visible floor around it reads as more spacious than a boxed-in bath.
– Waterproofing: Full strip-back and new membrane to Australian Standards across all wet areas. Non-negotiable, and the cheapest insurance in the whole project.
– Heating and ventilation: A 3-in-1 bathroom heater/exhaust/light replaced the ancient fan — silent, effective, and a genuine daily-luxury upgrade for Melbourne winters.
– Tapware: Brushed brass throughout (mixer, shower, towel rail, robe hooks). One finish, everywhere, no mixing metals.
The palette stayed restrained: warm white tiles, light oak vanity, brushed brass, one green plant. Timeless enough that it won’t date before Marcus sells.
[AFTER IMAGE PLACEHOLDER]Cost Breakdown
| Item | Cost |
|---|---|
| Demolition and waste removal | $1,500 |
| Plumbing rough-in (same layout) and fit-off | $3,000 |
| Electrical (downlights, 3-in-1 unit, new points) | $1,800 |
| Waterproofing (full wet areas, to standard) | $900 |
| Floor and wall tiling (labour + porcelain tiles) | $2,400 |
| Feature kit-kat tiles (vanity wall) | $650 |
| Wall-hung double vanity + basins | $1,600 |
| Freestanding bath 1500mm | $1,500 |
| Frameless shower screen + mixer | $1,800 |
| Toilet suite | $700 |
| Brushed brass tapware set | $900 |
| Mirror cabinet | $600 |
| Heated towel rail | $450 |
| Painting (ceiling + door) | $800 |
| 3-in-1 heater / exhaust / light | $550 |
| Design, selections and contingency | $5,350 |
| Total | $24,500 |
The total sits comfortably within Victoria’s typical mid-range bathroom band ($18,000–$28,000). The waterproofing line — under $1,000 — was the best money spent: skipping it would have risked tens of thousands in future water damage.
Key Takeaways
1. Waterproofing is not where you save money. A 50-year-old membrane is a liability. The $900 spent here protects the other $23,600. Always strip back and redo it in a full renovation.
2. Rehang the door before you move the plumbing. Changing the door swing cost almost nothing and unlocked the entire layout. It’s the highest-ROI change in small bathrooms.
3. One metal finish, everywhere. Mixed tapware finishes make a small bathroom look busy and piecemeal. Picking brushed brass for everything gave the room a designed feel for zero extra cost.
4. Large tiles in small rooms. It feels counterintuitive, but 600 × 600mm floor tiles with minimal grout lines make a compact bathroom feel bigger than small mosaics — and there’s less grout to scrub.
Homeowner Testimonial
“I was braced for it to feel like a compromise at this size, but the shower’s the best part of my morning now. And when I do sell, this is the room that’ll do the talking.” — Marcus