
Of all the money you’ll spend on a bathroom renovation, waterproofing is the one trade you never want to economise on. The tiles get admired and the tapware gets photographed — but the invisible membrane underneath is what stands between you and a five-figure repair bill. So what does bathroom waterproofing cost in Australia? For a standard bathroom in 2026, most homeowners pay $500 to $900, or roughly $40 to $60 per square metre. That figure moves with bathroom size, shower design and what’s hiding under your old tiles.
This guide covers what you’re paying for, what Australian law (AS 3740 and the National Construction Code) demands, how the job unfolds, whether you can DIY it, and how to pick a waterproofer who won’t leave you with a leak.
What bathroom waterproofing actually is (and isn’t)
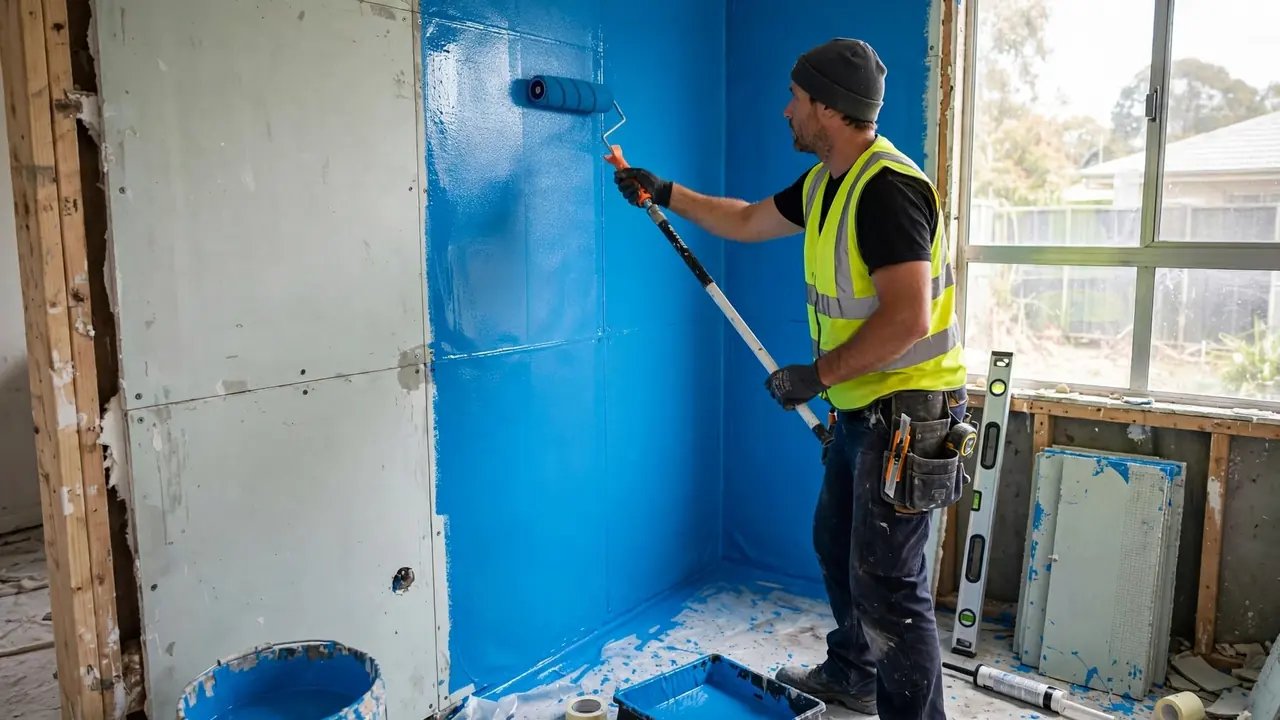
Here’s the misconception that causes half of all waterproofing disputes: tiles are not waterproof. Tiles and grout are water resistant — they shrug off splashes, but water migrates through grout lines, around tap penetrations and along junctions. The real waterproofing is a continuous liquid-applied membrane (usually a polyurethane or latex-based compound) painted onto the walls and floor before a single tile goes down. Once tiled, it’s invisible — which is exactly why it’s the most skipped, skimped-on and argued-about stage of a bathroom renovation.
A proper system has several layers:
- Primer — bonds the membrane to the substrate.
- Membrane coats — typically two coats of a product certified to AS/NZS 4858.
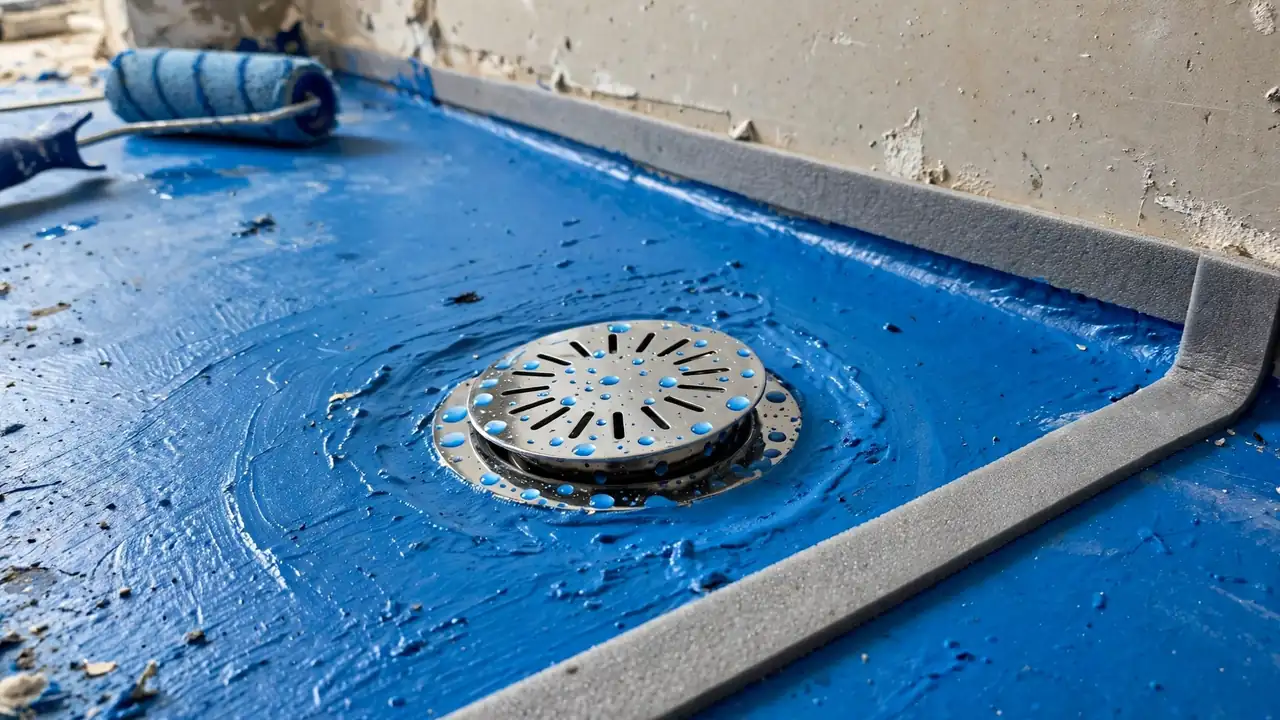
- Reinforcement at junctions — bond-breaker tape at every corner, because movement cracks rigid corners first.
- Sealed penetrations — every waste, tap hole and fixing gets a compatible flange integrated into the membrane.
If any one of those layers is missing or rushed, water finds the gap. Failed waterproofing often takes two to five years to announce itself — usually as a stain on the ceiling below.
Bathroom waterproofing cost in Australia (2026)
For a standard full bathroom, Australian waterproofers typically charge $500 to $900 — preparation, priming, membrane application and certification included. Expressed per square metre of treated area, expect $40 to $60/m². Trade pricing guides land in the same band: around $500–$750 for an average bathroom, up to $900 for larger or more complex jobs. When you’re comparing bathroom waterproofing cost quotes, insist on itemised line items — the cheapest quote often quietly drops the flood test or the compliance certificate.
| Bathroom type | Typical treated area | Indicative cost (2026) |
|---|---|---|
| Powder room / WC | 3–5 m² | $300 – $500 |
| Standard main bathroom | 8–12 m² | $500 – $900 |
| Large bathroom / walk-in shower | 12–20 m² | $800 – $1,400 |
| Ensuite | 5–8 m² | $450 – $750 |
These are indicative ranges, not quotes — always get itemised quotes from licensed waterproofers in your area. Five things move bathroom waterproofing cost within (or beyond) those bands:
- Shower design. A hobless walk-in shower needs a bigger waterproofed footprint — membrane to at least 1,500 mm from the rose — than a compact corner unit. Open showers cost the most to waterproof. Our walk-in shower design guide shows which layouts keep the wet area (and the bill) manageable.
- Floor level and substrate. Ground-floor concrete slabs are the simplest case. Upper-storey bathrooms and timber or particleboard floors must be fully waterproofed across the entire floor — more membrane, more labour, more cost.
- Substrate condition. Rotten sheeting, drummy render or wrong falls discovered under old tiles must be made good before membrane goes down. Remedial prep is where budgets blow out.
- Number of penetrations. Every waste, mixer and fixing is a potential leak point needing individual detailing. A double shower costs more than a single shower arm — more holes, more risk.
- Where you live. Sydney and Melbourne trade rates run 15–25% above regional centres. Remote areas add travel and limited competition.
One cost trap to name plainly: a quote dramatically below the range above usually means skipped steps — no primer, one coat instead of two, no flood test, no compliance certificate. Waterproofing is about 3–5% of a typical bathroom renovation budget; saving $300 here while risking a $15,000–$30,000 rectification (strip-out, re-waterproof, re-tile) is the worst trade in renovating. If you’re budgeting the whole project, our bathroom renovation cost per square metre guide puts waterproofing in context alongside every other line item.
What Australian law requires: AS 3740 and the NCC
Bathroom waterproofing isn’t optional — it’s a legal requirement. The National Construction Code (NCC) sets out what must be waterproofed, and Australian Standard AS 3740:2021 describes how. Compliance with AS 3740 is the normal way to satisfy the Code. In plain English:
- Inside the shower: the entire shower floor must be waterproofed, including any hob or step-down. Shower walls must be waterproofed to at least 1,800 mm above the finished floor — or 50 mm above the shower rose, whichever is higher. Wall-to-wall and wall-to-floor junctions must be waterproofed at least 40 mm either side of the junction, and every penetration (taps, wastes, fixings) sealed.
- Outside the shower: concrete and fibre-cement floors must be water resistant; timber-based floors (particleboard upstairs, for example) and any bathroom above ground floor must be fully waterproof across the whole floor. Doorways generally need a waterstop so water can’t run out under the door.
- Around baths and basins: walls within 75 mm of a bath, basin or laundry tub must be water resistant to at least 150 mm above the vessel; the junction along a built-in bath must be waterproof.
- Materials: the membrane itself must be certified to AS/NZS 4858, applied to approved substrates, as a compatible system — you can’t mix a primer from one brand with a membrane from another and claim compliance.
- Falls: the shower floor must fall between 1:80 and 1:50 to the waste; the surrounding floor at least 1:100. Water that can’t drain is water that finds another way out.
Crucially, the membrane must be inspected before tiling — once tiles go down, compliance can’t be verified without destructive investigation. Reputable waterproofers provide a compliance certificate stating the work meets AS 3740; insurers, building inspectors and future buyers all ask for it. The Australian Building Codes Board publishes the NCC and Housing Provisions if you want the source documents.
How bathroom waterproofing is done, step by step
A proper bathroom waterproofing job takes three to seven days including curing time, and it can’t be rushed: membrane applied to a damp substrate or tiled over before it’s cured will fail. Knowing the sequence helps you spot corner-cutting:
- Strip and inspect (day 1). Old tiles and fixtures come off; the waterproofer checks the substrate for damage and correct falls. Repairs — new sheeting, re-screeding — happen now.
- Clean and prime (day 1–2). The substrate is cleaned, then primed — primer is the chemical bond between substrate and membrane.
- Detail the junctions (day 2). Bond-breaker tape goes into every internal corner; flanges are fitted to wastes and penetrations. This detailing is where cheap jobs fail first.
- Apply the membrane (day 2–3). Two full coats, with drying time between them — typically 24 to 72 hours for application stages depending on product and weather.
- Cure and flood test (day 3–5). The membrane cures 24–48 hours minimum, then the shower is flood-tested: plugged, filled and left 24 hours to confirm zero leakage. Skipped flood tests are a red flag.
- Certify (day 5+). The waterproofer issues the AS 3740 compliance certificate with product and warranty details. Only then does the tiler start.
Humidity and temperature matter: curing takes longer in a damp Melbourne winter than a dry Perth summer. A waterproofer who promises to waterproof and tile in two days is promising you a future insurance claim.
Can you DIY bathroom waterproofing?
You can buy the products at any hardware store. Practically, don’t — in many situations you legally can’t. Waterproofing is treated as specialist work, and most states require a licensed waterproofer for the compliance certificate to mean anything.
Even where DIY isn’t explicitly banned, the consequences stack up against it — the few hundred dollars of bathroom waterproofing cost you save isn’t worth the risk:
- Insurance. Home insurers routinely reject water-damage claims when waterproofing was done by an unlicensed person without certification. You’re self-insuring a five-figure risk to save a few hundred dollars.
- Resale. Pre-purchase building inspectors use moisture meters. Failed or uncertified waterproofing shows up, and buyers either walk away or discount hard.
- Warranty. Membrane manufacturers’ warranties (typically around 10 years) generally require application by a trained/licensed applicator to the product’s specification. DIY voids them.
- Skill. The membrane is the easy part; the detailing — junctions, penetrations, falls — is a craft. It’s the number one thing owner-builders get wrong.
The same logic applies double to ensuites, which sit above living spaces more often than main bathrooms — one leak damages two rooms. See our ensuite design ideas for Australian homes for layouts, then hand the waterproofing to someone licensed.
7 signs your bathroom waterproofing has failed
Failed waterproofing rarely announces itself in the bathroom — it shows up somewhere else:
- Water stains on the ceiling below — the classic giveaway for upstairs bathrooms; yellow-brown rings that grow after showers.
- Peeling or bubbling paint on walls adjoining the bathroom, especially near the shower.
- Persistent mould in grout or silicone that returns within weeks of cleaning — it suggests moisture behind the tiles.
- A musty smell in the bathroom or adjacent rooms with no visible source.
- Loose or drummy tiles — a hollow sound when tapped means moisture has compromised the adhesive bed.
- Swollen skirting boards or door frames near the bathroom, or warped timber flooring.
- Damp readings — a $30 moisture meter from the hardware store, or a building inspector’s report, showing elevated readings in walls around wet areas.
There’s no patching a failed membrane: the bathroom gets stripped to substrate, re-waterproofed and re-tiled — typically $15,000 to $30,000+, plus whatever the leak damaged on its way through. That asymmetry ($500–$900 to do it right versus tens of thousands to fix it) is the entire argument for never economising here.
How to choose a waterproofer (and the questions to ask)
Waterproofing is one trade where the cheapest quote is genuinely dangerous. Vet like this:
- Licence first. Check their licence with your state building authority (NSW Fair Trading, QBCC, VBA). No licence, no job.
- “Will you provide an AS 3740 compliance certificate?” If the answer is vague, walk away. The certificate is the whole point.
- “Which membrane system, and is it AS/NZS 4858 certified?” They should name the product without hesitation.
- “Do you flood test?” The answer must be yes, with the test described — not “we visually inspect.”
- “What’s the warranty, and who backs it?” Expect around 10 years on the membrane when applied to specification. Get it in writing, separate from any builder’s warranty.
- Itemised quote. Preparation, priming, membrane, detailing, flood test and certification as visible line items — not a single number.
- Photos of work in progress. Good waterproofers photograph the membrane before tiling as standard practice. Ask to see them.
Get three quotes and be suspicious of the outlier in either direction. When the quotes land, don’t choose on bathroom waterproofing cost alone — choose on the compliance certificate. The middle quote from a licensed operator who flood-tests and certifies is almost always right.
Frequently asked questions
How much does it cost to waterproof a bathroom in Australia?
Most homeowners pay $500–$900 for a standard bathroom, or $40–$60 per square metre of treated area. Powder rooms run $300–$500; large bathrooms with walk-in showers run $800–$1,400. Quotes vary with shower design, floor level, substrate condition and your city’s trade rates.
How long does bathroom waterproofing take?
The full process takes 3–7 days: 1–2 days for preparation and priming, application of two membrane coats over 24–72 hours, then 24–48 hours of curing plus a flood test before tiling can begin. Humid or cold weather extends curing time.
How long does bathroom waterproofing last?
A correctly applied membrane typically carries a warranty of around 10 years and can last the life of the bathroom when the detailing was done properly. Most failures trace back to poor junction detailing or skipped preparation, not the membrane product itself.
Can I waterproof my own bathroom in Australia?
It’s strongly inadvisable. Most states treat waterproofing as specialist work requiring a licensed applicator, and DIY work generally can’t produce the AS 3740 compliance certificate that insurers, builders and buyers require. Failed DIY waterproofing can void your home insurance for water damage.
What does AS 3740 require for bathrooms?
AS 3740:2021 (referenced by the National Construction Code) requires shower floors to be fully waterproofed, shower walls waterproofed to at least 1,800 mm (or 50 mm above the shower rose, whichever is higher), all junctions and penetrations sealed, timber and upper-storey floors fully waterproofed, and membranes certified to AS/NZS 4858 — with inspection and certification before tiling.
What happens if bathroom waterproofing fails?
Water migrates into walls, floors and ceilings — causing mould, structural damage and stained ceilings below. There’s no patch fix: rectification means stripping the bathroom to substrate and starting over, typically $15,000–$30,000+. Insurance may reject the claim without a compliance certificate from licensed work.