
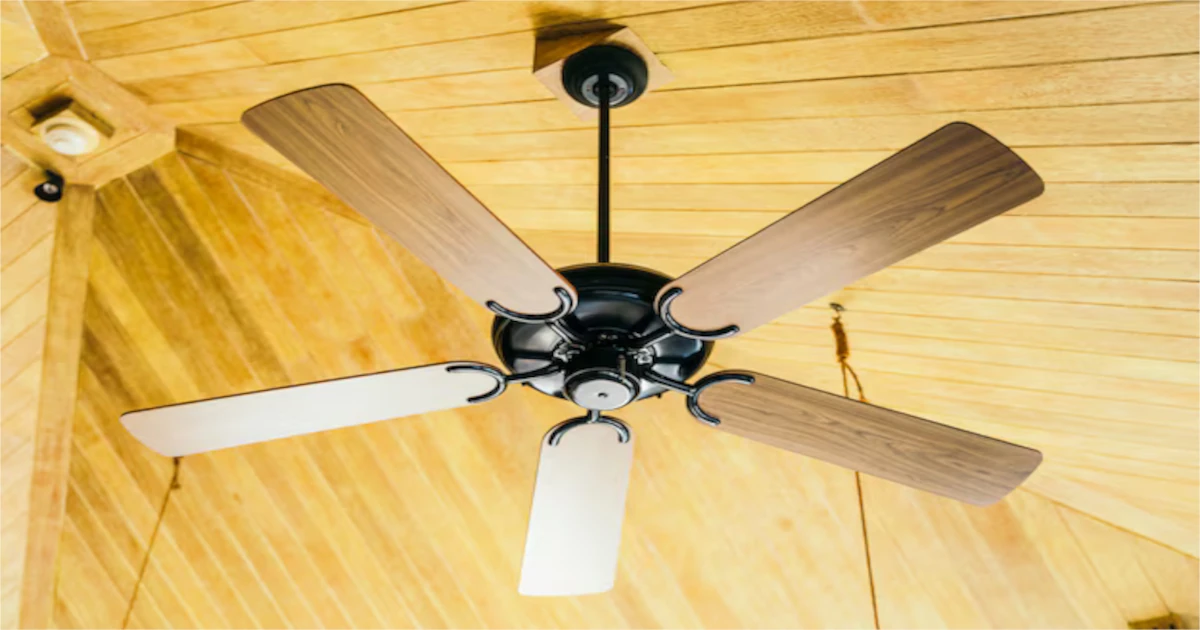
Ceiling Fans with Remote Control: The Ultimate Guide to Comfort and Convenience
In today’s fast-paced world, comfort and convenience are no longer luxuries — they’re essentials. And nothing marries these two concepts quite like a ceiling fan with remote control. Once considered a simple cooling device, the ceiling fan has evolved into a sleek, efficient, and versatile home essential that’s perfect for modern living spaces. This article explores everything you need to know about ceiling fans with remote controls, from their benefits and types to features and maintenance. Whether you’re upgrading your existing fan or shopping for your first, this guide will give you the insights needed to make an informed decision.
Introduction to Ceiling Fans with Remote Control
A ceiling fan with remote control is simply a fan that includes an integrated or compatible remote to adjust speed, direction, and sometimes lighting, without needing to use a wall switch. This technology not only adds convenience but also makes a significant difference in the energy efficiency and functionality of a room.
Gone are the days of pulling chains or flipping switches — today’s ceiling fans with remotes provide effortless control. With just a click, you can adjust the fan speed, reverse the blades to accommodate seasonal changes, and even control integrated lighting. This blend of comfort, style, and functionality is why these fans have become a popular choice for homeowners.
Benefits of Ceiling Fans with Remote Control
The allure of remote-controlled fans goes beyond convenience. Here are the key benefits:
Enhanced Convenience
With a remote control, you can adjust the fan speed or turn it on and off from anywhere in the room. This convenience is particularly useful for large rooms, bedrooms, and even outdoor spaces.
Improved Energy Efficiency
Ceiling fans help reduce reliance on air conditioning by enhancing airflow, allowing you to set the AC at a higher temperature. By making small adjustments with the remote, you can find the optimal setting that balances comfort with energy savings. For more ways to cut household energy use, see our energy-efficient home design ideas for Australian homes.
Increased Comfort for All Seasons
A ceiling fan with a reversible motor allows you to change the direction of the blades. In summer, the fan rotates counterclockwise to create a cool breeze. In winter, a clockwise rotation distributes warm air evenly, helping you stay cosy and reducing heating costs.
Stylish and Modern Aesthetics
Remote-controlled ceiling fans come in a variety of designs, from minimalist and sleek to luxurious and ornate. These fans blend seamlessly into modern home designs and enhance the room’s aesthetics.
Safer Operation
For households with children, remote-controlled fans eliminate the need for pull chains, making them safer for kids.
Smart Home Integration
Many modern ceiling fans with remotes integrate with smart home systems, letting you schedule operation, create automation routines, and even control the fan with your voice through assistants like Alexa or Google Home.
Quieter Operation
Remote-controlled fans with DC motors run noticeably quieter than older chain-driven models, making them ideal for bedrooms, nurseries, and home offices where noise matters.
Types of Ceiling Fans with Remote
Remote-controlled ceiling fans come in several styles, designed to suit various room types and preferences:
Indoor Ceiling Fans
Ideal for bedrooms, living rooms, kitchens, and hallways, indoor ceiling fans come in various sizes and styles to fit different spaces and décor.
Outdoor Ceiling Fans
Designed for patios, decks, and porches, outdoor fans are built to withstand the elements. Remote controls add an extra layer of convenience, allowing you to control the fan from afar.
Low-Profile Ceiling Fans
Perfect for rooms with low ceilings, these fans are mounted closer to the ceiling and often have sleek, compact designs. With a remote, you won’t need to worry about limited reach for manual controls.
Dual Motor Ceiling Fans
Featuring two fan heads, dual motor ceiling fans offer superior airflow and make a bold style statement. The remote control lets you independently adjust each fan head’s speed and direction.
Features to Consider When Buying a Ceiling Fan with Remote
Selecting the right fan with a remote involves understanding the various features available:
Fan Size
The size of your fan should match the room’s dimensions. Large rooms benefit from bigger fans (52 inches or more), while small fans (around 29–36 inches) are ideal for compact spaces.
Remote Control Features
Some remotes only control speed, while others can adjust the lighting and switch between summer and winter modes. Choose a fan that offers a range of options to match your preferences.
Motor Type
High-quality ceiling fans typically come with either an AC (alternating current) motor or a DC (direct current) motor. DC motors are more energy-efficient, quieter, and often feature more speed options.
Lighting Options
Many ceiling fans come with integrated lights. If you need both a fan and a light in one, consider models with dimmable LED lights that can be controlled via the remote.
Reversible Motor
For all-season use, select a fan with a reversible motor, which you can adjust to suit different weather conditions. Most reversible motors can be controlled using the remote.
Blade Material and Style
Ceiling fan blades come in various materials such as wood, plastic, or metal. The material and style should complement your room’s aesthetic and functional needs.
Best Ceiling Fans with Remote for Every Space
Choosing the best remote-controlled fan depends on your room size, style, and desired features:
Best for Bedrooms: Silent Operation Fans
Look for fans specifically designed for quiet operation with a sleep mode setting on the remote to reduce speed gradually.
Best for Living Rooms: Large, Stylish Fans
For larger spaces, choose a fan with a wide blade span (52 inches or more). Consider models that offer multi-speed options and stylish finishes like wood or matte black.
Best for Patios and Outdoor Spaces: Weatherproof Fans
Outdoor fans with weatherproof blades and moisture-resistant motors are essential for covered porches or open patios. Look for a remote with fan speed control and possibly a light dimming function for outdoor ambience.
Best for Small Spaces: Compact, Low-Profile Fans
Compact fans are ideal for rooms with low ceilings or tight spaces. Choose a model with a streamlined remote and minimal settings for ease of use.
Installing Your Ceiling Fan with Remote Control
Installing a ceiling fan with a remote control can be straightforward, but it requires careful attention to detail to ensure safety, functionality, and proper performance. Follow these steps for a smooth installation process, whether you’re a DIY enthusiast or working alongside a professional installer. Every ceiling fan model is slightly different, so always check the manufacturer’s instructions for specifics.
Turn Off the Power
Safety is the top priority when working with electrical wiring. Before starting, switch off the circuit breaker that supplies power to the fan’s location. Double-check that the power is off using a non-contact voltage tester to ensure there is no live current in the wires.
Gather Your Tools and Materials
Having everything ready makes installation smoother. Most installations require:
- Screwdriver set (flat and Phillips heads)
- Pliers or wire strippers
- Voltage tester
- Ladder or step stool
- Wire nuts (if not provided in the fan kit)
Verify that you have all the parts from the fan package, including the mounting bracket, motor housing, fan blades, screws, and remote receiver. Familiarise yourself with each part before you begin.
Assemble the Fan Components
Partially assemble the ceiling fan on a flat, stable surface according to the manufacturer’s instructions:
- Blades and Motor Housing: Some fans require the blades to be attached after mounting, while others are pre-assembled. Attach blade arms or decorative elements, but wait until the fan is mounted before installing the blades.
- Remote Receiver Placement: Locate where the remote receiver fits in the fan canopy or ceiling bracket — it usually sits snugly inside the fan housing, allowing a seamless connection to the remote.
Install the Mounting Bracket
Securely attaching the mounting bracket to a ceiling joist or brace is essential for stability:
- Locate the Ceiling Joist: Use a stud finder to find a joist or brace capable of supporting the fan’s weight. If there is no joist where you want the fan, install a fan-rated support brace, available at most hardware stores.
- Attach the Bracket: Use the screws provided with the fan kit to fasten the mounting bracket to the ceiling box. Make sure the bracket is tight and level, as a loose bracket can cause wobbling or noise.
Connect the Wiring and Remote Receiver
This is where the electrical wiring takes place. Follow these steps carefully:
- Identify the Wires: Typically, ceiling fans have three main wires: a black (hot) wire, a white (neutral) wire, and a green or bare copper (ground) wire. The remote receiver also has wires — one side connects to the ceiling wiring, the other to the fan.
- Wire the Receiver Input: Connect the ceiling wiring to the input side of the remote receiver: black wire (from ceiling) to black wire (receiver input); white wire (from ceiling) to white wire (receiver input).
- Connect the Fan Wires to the Receiver Output: Black (fan motor) to black (receiver output); white (fan motor) to white (receiver output); blue (if the fan has a light) to the blue wire on the receiver.
- Ground the Fan: Connect the ground wire (green or bare copper) from the ceiling to both the bracket and the fan’s ground wire.
- Secure with Wire Nuts and Electrical Tape: Use wire nuts to secure each connection, then wrap each wire nut with electrical tape for extra security.
Mount the Fan Motor and Attach the Canopy
With the wiring complete, attach the fan motor to the mounting bracket:
- Lift the Fan Motor Assembly: Carefully lift the fan motor and position it on the mounting bracket. Some fans have a hook to temporarily hold the motor while you secure it.
- Secure the Canopy: Push the canopy (the decorative cover) over the mounting bracket and tighten any screws, ensuring a snug fit.
Attach the Fan Blades
- Install Blade Arms (if applicable): Some fans require attaching blade arms to the motor before installing the blades.
- Attach Each Blade Securely: Using the screws provided, attach each blade to the fan motor or blade arms, making sure every screw is tight to prevent wobbling.
- Double-check for Balance: Uneven blades can cause wobbling or noise. Use a balancing kit if necessary.
Install the Light Kit (Optional)
If your fan includes a light kit:
- Connect the Light Wires: Attach the light kit’s wires to the fan motor housing according to the manufacturer’s instructions, usually matching the blue (light) wire to the light kit’s power wire.
- Secure the Light Fixture: Attach the light fixture to the fan’s motor housing and secure with screws.
- Install Bulbs and Shades: Add any bulbs, shades, or covers included. Use LED bulbs for energy efficiency.
Test the Fan and Remote
With everything in place, it’s time for the final check:
- Restore Power: Turn the circuit breaker back on.
- Test the Fan Operation: Use the remote to turn on the fan and adjust the speed settings. Verify that the fan rotates smoothly without wobbling or excessive noise.
- Check Light Functionality (if applicable): Test the light function on the remote, ensuring it turns on/off and dims correctly.
- Adjust the Direction: Use the remote to reverse the blade direction (if applicable) to confirm the season-adjustable feature works.
Additional Tips for Successful Installation
- Balance the Fan: If your fan wobbles, use a balancing kit to stabilise it. Slight wobbling can usually be fixed by adjusting the blade weights.
- Pairing the Remote (if needed): Some models require a pairing process between the remote and the receiver. Check the manual if the remote doesn’t work immediately.
- Check for Noise: Listen for any unusual sounds. Rattling or clicking can indicate loose screws, so double-check all connections if needed.
Final Thoughts
Installing a remote-controlled ceiling fan adds comfort and ease to any room. By following these steps carefully, you’ll ensure a secure installation that enhances airflow and style in your space. A properly installed ceiling fan operates quietly and helps you achieve maximum energy efficiency, adding value to your home in both functionality and aesthetics.
Maintenance and Troubleshooting
Proper maintenance can extend the lifespan of your ceiling fan and ensure efficient operation.
Cleaning the Fan
Dust and clean the fan blades regularly, as dirt accumulation can hinder remote control performance.
Tightening Loose Parts
Periodically check and tighten screws and bolts to prevent wobbling or noise.
Replacing Remote Batteries
If the fan doesn’t respond to the remote, start by replacing the batteries.
Resetting the Remote
Most remote controls have a reset button. If the remote isn’t functioning properly, try resetting it according to the user manual.
Conclusion
Ceiling fans with remote controls are an excellent addition to any modern home. They offer unparalleled convenience, enhanced comfort, and energy savings, making them an eco-friendly choice as well. From large living rooms to cosy bedrooms and outdoor patios, these fans come in a variety of styles and sizes to suit any space.
Choosing the right fan is all about understanding your needs — whether it’s quiet operation, energy efficiency, or a particular aesthetic. By considering factors like fan size, motor type, and the specific features of the remote, you can find the perfect fan to enhance your space.
With a remote-controlled ceiling fan, you gain not only comfort and convenience but also an elegant, practical addition that elevates the ambience of your home.
Frequently Asked Questions (FAQs)
How do I connect a remote control to my ceiling fan?
Connecting a remote to your ceiling fan involves wiring a receiver in the fan’s housing and pairing it with the remote. Follow the manufacturer’s instructions, ensuring the power is off before starting. If you’re unsure, consulting an electrician can make the installation process safe and smooth.
Can I use a remote with an existing ceiling fan?
Yes, many ceiling fans can be retrofitted with a remote control kit. Check compatibility with your specific model, as some remote kits are universal while others work with particular brands. A retrofit remote kit can offer added convenience without needing to replace the entire fan.
What should I do if my ceiling fan remote stops working?
First, replace the batteries, as a low charge often causes connectivity issues. If that doesn’t help, check for obstructions between the fan and the remote and try resetting the remote by following the user manual. In some cases, the receiver inside the fan might need inspection or replacement.
Can I control the lighting on my ceiling fan with the remote?
Yes, many ceiling fans with remotes offer integrated light control, including dimming or brightness adjustment. Look for models that specify lighting control on the remote, or consider an upgrade if your fan currently lacks this function.
Are ceiling fans with remote controls energy-efficient?
Ceiling fans with remote controls can improve energy efficiency, especially models with DC motors, as they use less electricity and have multiple speed settings. By using the remote, you can adjust airflow more accurately to reduce the need for additional heating or cooling, ultimately saving energy.
Is there a difference between indoor and outdoor ceiling fans with remote control?
Yes, outdoor ceiling fans are designed to withstand moisture, humidity, and temperature changes, making them suitable for patios, decks, and other outdoor areas. Indoor fans are not built for these conditions, so if you’re considering a fan for outdoor use, choose a weather-resistant model with a remote control.