
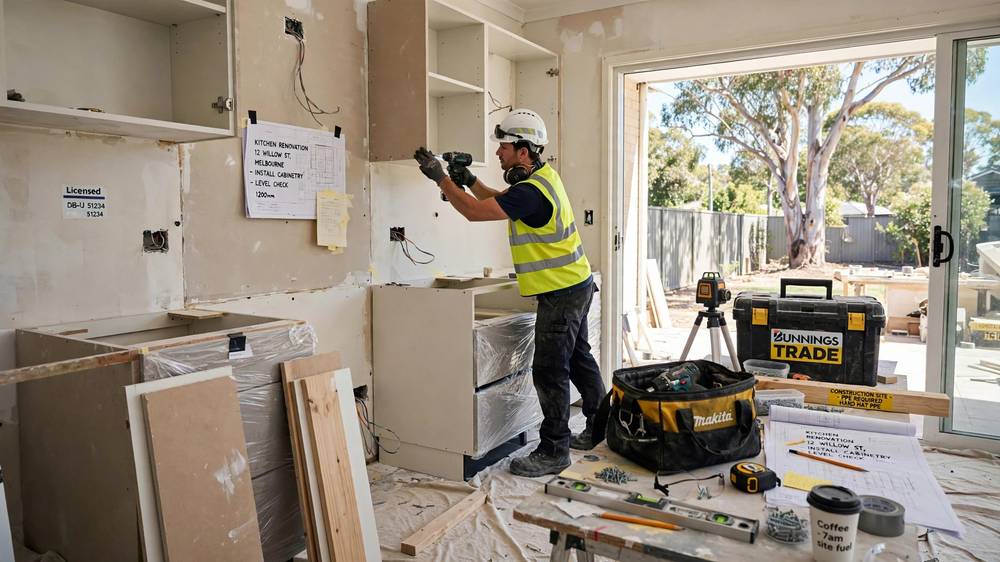
Learning how to renovate a house in Australia is equal parts exciting and overwhelming. Every year, tens of thousands of Australian homeowners take on renovations ranging from a single bathroom refresh to a full structural rebuild — and the difference between a project that runs smoothly and one that spirals into stress, delays and budget blowouts almost always comes down to planning. This guide walks you through the entire process in order, from defining your goals and setting a budget, through council approvals, asbestos checks, hiring trades and contracts, right to the final walkthrough.
1. Define Your Goals Before Anything Else
Every good renovation starts with an honest answer to one question: *why* are you renovating?
Your reason changes almost every decision that follows:
- Live in it (owner-occupier): Renovate for your lifestyle. Spend more on what matters to you daily — the kitchen you cook in, the bathroom you use every morning. You’re less bound by resale logic, so customise boldly.
- Sell it (flip or pre-sale refresh): Every dollar should return more than it costs. Focus on high-impact, low-cost upgrades — fresh paint, new flooring, landscaping, a facelifted kitchen rather than a full rebuild. Stick to neutral finishes and know the ceiling price of your suburb; overcapitalising is the most common way renovators lose money.
- Rent it out (investor): Durability beats design statements. Choose hard-wearing materials that survive tenants — vinyl plank flooring, laminate benchtops, easy-clean paint finishes. Keep the layout practical and the maintenance low.
Write your goal down and pin it where you’ll see it during the project. When you’re tempted by an upgrade mid-build, ask whether it serves your goal. If it doesn’t, skip it.
2. Set a Realistic Budget (With Contingency)
This is the step most renovators get wrong, and the most expensive one to fix later. Industry estimates from the Housing Industry Association (HIA) put the average Australian renovation at around $63,500 — but averages hide a huge range. A cosmetic refresh can cost a fraction of a whole-house rebuild.
For whole-house renovations, industry estimates typically land between $2,500 and $5,000 per square metre, depending on location, finish level and how much structural work is involved. That means a 100 m² renovation can range anywhere from $250,000 to $500,000 before you add anything unexpected.
And unexpected things always appear. Hidden water damage, termites, out-of-code wiring, asbestos — Australian homes love surprises. This is why every experienced renovator adds a contingency of 10–15% on top of the budget. On a $100,000 project, that means keeping $10,000–$15,000 aside that you genuinely plan not to touch unless something goes wrong. The contingency isn’t spare change for upgrades; it’s insurance against the unknown.
To calibrate your numbers, check our renovation cost database and run the numbers through our free renovation calculators before you commit to a scope.
A practical budgeting framework:
- Total budget: the maximum you can spend without financial strain — be honest here, not optimistic.
- Scope cost: get it estimated against real quotes (see step 4), not guesses.
- Contingency: 10–15% held back, non-negotiable.
- Cash flow: make sure money arrives when trades need to be paid (deposits, progress payments, final payments).
If the scope cost plus contingency exceeds your total budget, shrink the scope — don’t shrink the contingency.
3. Create a Scope of Works
With goals and budget set, write down exactly what will happen in the renovation — room by room. This document is your scope of works, and it becomes the basis for every quote you request, every contract you sign, and every trade you brief.
For each room or area, list:
- Must-haves: the non-negotiable items (e.g. replace leaking shower, rewire the kitchen, fix the rotten subfloor).
- Nice-to-haves: items you’ll do if the budget allows (e.g. heated towel rails, skylights, stone benchtops instead of laminate).
- Finishes: be as specific as you can — paint colours, tile sizes, tapware brands. Trades quote more accurately when they know what they’re installing.
Why the scope matters
Vague briefs get vague quotes. “Renovate the bathroom” might mean $8,000 to one tiler and $30,000 to another, and you’ll have no way to compare them. “Strip bathroom to studs; install 600×600 floor tiles; wall-hung vanity; walk-in shower with frameless screen; rewire to current standards” gives every tradesperson the same target.
Keep your scope as a living document. When changes happen — and they will — update it, get the cost confirmed in writing, and check it against your budget and contingency.
4. Research Costs and Get at Least Three Written Quotes
Trade rates vary wildly across Australia — and even within the same suburb. The only way to know what your project should cost is to get multiple quotes for the same scope of works.
The three-quote rule
For every trade, get at least three written quotes based on the *identical* scope. Written is non-negotiable — verbal quotes evaporate the moment there’s a dispute. Ask each tradesperson:
- What exactly is included (and what isn’t)?
- What brand and model of fixtures, fittings and materials are allowed for?
- How long will their stage take, and when can they start?
- What’s the payment schedule?
When quotes come back, the cheapest isn’t automatically the winner. A quote that’s dramatically lower than the others often means something was left out — the waterproofing, the tip fees, the GST — or the tradesperson is cutting corners you’ll pay for later. Look for the quote in the middle of the pack with the clearest breakdown.
Typical trade rates (Australia, 2026)
Rates shift with demand and location, but as an industry estimate, here’s what Australian homeowners are typically paying:
| Trade | Typical rate | Notes |
| Builder (labour) | $60–$100/hr or $2,500–$5,000/m² for whole-house | Day rates common for larger jobs |
| Electrician | $90–$140/hr | Call-out fees of $100–$180 are standard |
| Plumber | $90–$150/hr | Rough-in vs fit-off priced differently |
| Carpenter | $60–$95/hr | Framing, flooring, architraves |
| Tiler | $60–$100/m² | Labour only; mosaics and large format cost more |
| Painter | $35–$60/m² or $4,000–$12,000 for a full house interior | Prep quality drives the price |
| Plasterer | $40–$70/m² | Includes set and finish |
| Waterproofing specialist | $1,500–$3,500 per wet area | Licensed work — non-negotiable in bathrooms |
| Cabinet maker | $8,000–$25,000 for a kitchen | Joinery varies most with finish level |
| Demolition | $50–$100/m² | More if asbestos is involved |
These are industry estimates to guide your budgeting — always confirm against your own written quotes. For a deeper breakdown by room and project type, see our renovation cost database, which also covers whether the spend adds value: our guides on kitchen renovation value and bathroom renovation value walk through the return-on-investment side of the two most expensive rooms.
5. Sort Your Finance
Knowing the budget is one thing; having the money available at the right moments is another. Trades need deposits before they start and progress payments as they go — you can’t pay a tiler with equity you haven’t accessed yet.
The main financing options Australian renovators use:
- Savings: the cheapest money there is. If your project fits within savings plus contingency, this is the cleanest path — no interest, no valuations, no paperwork.
- Equity / redraw: if your home has grown in value, you may be able to redraw on your mortgage or refinance to access equity. Typically the lowest-interest borrowing option, but it does increase your mortgage.
- Construction loan: for larger structural renovations, banks release funds in stages as work is completed, with inspections at each stage. More paperwork, but it keeps spending disciplined and aligned to progress.
- Personal loan: faster to arrange than a construction loan, but interest rates are higher and terms shorter. Fine for smaller projects where the numbers still stack up.
A note on borrowing to renovate
Whatever you borrow, run the numbers honestly. Add up the total interest over the loan term, not just the monthly repayment. And if you’re renovating to sell, check that the post-renovation value genuinely covers the renovation cost *plus* the borrowing cost *plus* selling costs — a useful sanity check is reading a property investment perspective on renovation costs before you commit.
6. Check Council Approvals
One of the most common and costly mistakes in Australian renovations is starting work that needed approval. Council requirements vary by state and local government area, but the broad pattern is:
- Exempt development: minor internal work that doesn’t change structure or footprint — painting, new kitchens and bathrooms (like-for-like), flooring — usually needs no approval.
- Complying development (CDC): a faster, tick-box approval path through a private certifier for straightforward work that meets preset standards. Common for internal structural changes, some extensions and secondary dwellings.
- Development Application (DA): full council assessment for work that changes the building’s footprint, height, appearance from the street, or use — extensions, second storeys, significant structural changes. This is the slow lane.
Allow serious time
Approvals take weeks to months. A CDC might turn around in a few weeks; a DA in a metro council can take three to six months, longer if neighbours object or heritage overlays apply. Start the approval process *before* you book trades, because a builder’s start date means nothing if the paperwork isn’t approved.
Call your council or a private certifier early and describe your plans plainly. A ten-minute conversation can save you from a stop-work order — and from the fines and retrospective-application headaches that come with building without approval.
7. Asbestos Audit: Do This Before Any Demolition
If your home was built before 1990, assume it contains asbestos until proven otherwise. Asbestos was used in thousands of Australian building products — fibro sheeting, eaves, bathroom wall linings, vinyl floor tiles, pipe lagging, even old switchboards.
The rule is absolute: get a NATA-accredited asbestos audit before any demolition begins. A licensed assessor takes samples and has them tested in an accredited lab. If asbestos is found:
- Only a licensed asbestos removalist may remove friable asbestos (and in most states, any significant amount of bonded asbestos too).
- The removalist must provide a clearance certificate after the work, confirming the area is safe.
- Never DIY asbestos removal. The health risks are severe, and the fines for illegal handling are steep.
Build the audit into your timeline and budget early — discovering asbestos mid-demolition stops everything and costs far more than finding it in advance.
8. Hire Licensed, Insured Trades
Your renovation is only as good as the people doing the work. In Australia, licensing requirements differ by state, but the principle is the same everywhere: check before you hire.
For every tradesperson, verify:
- Licence: check it against your state licensing authority’s public register (e.g. NSW Fair Trading, the VBA in Victoria, QBCC in Queensland). Make sure the licence class covers the work you’re asking for and that it’s current.
- Insurance: public liability insurance at minimum; for builders, home building compensation insurance (called different names per state) on projects above the threshold.
- References: ask for two or three recent clients and actually call them. Ask what went wrong, not just what went well.
- Past work: look at photos of completed jobs similar to yours — or better, visit one in person.
Watch for red flags: no written quote, demands for large cash deposits, no licence number on their paperwork, pressure to start tomorrow, or a price so low it can’t cover legitimate costs. A good tradesperson is busy — a wait of a few weeks for the right person beats a disaster from the wrong one.
9. Get a Proper Contract
Never, ever renovate on a handshake. A proper contract protects both you and the tradesperson, and in most states it’s a legal requirement for residential building work above a certain value.
Your contract should spell out:
- The full scope of works (attach your scope document).
- The total price and exactly how it’s calculated (fixed price vs cost-plus).
- The payment schedule — deposits, progress payments tied to completed stages, and a final payment held until defects are fixed.
- Start and completion dates, plus what happens if dates slip.
- Warranties on workmanship and materials.
- How variations (changes to the scope) are priced and approved — always in writing, always before the work is done.
- Dispute resolution process.
Read every contract before signing, and don’t be rushed. For larger projects, having a solicitor or building consultant review the contract is money well spent. Our free renovation calculators can help you sanity-check payment schedules against typical stage percentages.
10. Plan the Trade Sequence
Renovations follow a strict order, and doing things out of sequence causes expensive rework. Painting before the electrician cuts holes for downlights, for example, means painting twice. Here is the standard sequence for a whole-house or major room renovation:
1. Demolition and strip-out — remove what’s going (after the asbestos clearance, see step 7).
2. Structural work — new walls, openings, beams, subfloor repairs.
3. Plumbing and electrical rough-in — pipes and wiring run before walls are closed.
4. Waterproofing — wet areas waterproofed by a licensed waterproofer.
5. Plastering — walls and ceilings sheeted and set.
6. Waterproofing re-check — confirm membranes are intact after plastering.
7. Tiling — floors and walls tiled.
8. Cabinetry and joinery — kitchen, vanities, wardrobes installed.
9. Fit-off — plumber and electrician return to fit taps, power points, lights, appliances.
10. Painting — after the dusty trades are done.
11. Flooring — timber, hybrid or carpet laid late to avoid damage.
12. Final clean — builders’ clean, inside and out.
Coordinate like a project manager
Whether you hire a builder to manage everything or coordinate trades yourself, someone must own the schedule. Confirm each trade’s start date a week out, and have the next trade lined up before the current one finishes — idle days between trades are where timelines blow out. Keep a simple shared timeline (even a whiteboard or spreadsheet) showing who is on site when.
11. Arrange Renovation Insurance
Your standard home and contents policy often doesn’t cover a property under renovation — and some policies are voided the moment structural work begins. Before work starts:
- Call your insurer and describe the renovation. Get written confirmation of what’s covered during the works.
- Consider contract works insurance (also called builders’ risk), which covers the works in progress against fire, storm, theft and vandalism.
- Check public liability coverage for the site — if a visitor is injured on your property during the renovation, you want to be covered.
- If you’re moving out during the renovation, tell your insurer; an unoccupied home may need a different policy.
This is a half-hour phone call that protects a six-figure investment. Don’t skip it.
12. Plan Waste Removal
Renovations generate astonishing amounts of waste — old cabinetry, plasterboard, tiles, timber, packaging. If you don’t plan for it, rubbish piles up, slows trades down, and can draw council fines.
Your options:
- Skip bins: the standard choice. Order the right size (a bathroom strip-out might need 4 m³; a whole-house demo can need 20 m³ or multiple swaps). Check whether your council requires a permit for a skip on the nature strip or street.
- Tip runs: fine for small jobs if you have a trailer, but factor in tip fees and your time.
- Trade-included removal: some demolition and trade quotes include waste removal — confirm whether yours do, so you’re not paying twice.
Separate recyclable materials where practical — many tips and recyclers take clean timber, metal and cardboard at lower rates than mixed waste, and metal has scrap value. And never put asbestos waste in a skip; it requires licensed hazardous-waste disposal with its own paperwork trail.
13. Inspect Quality at Each Stage
Don’t wait until the end to check the work. Inspect at every stage, while problems are still cheap to fix. Tiling errors found before grouting cost a fraction of errors found after the bathroom is finished.
At each inspection:
- Compare against the scope and contract — is what was promised actually done?
- Check the details — tile alignment, paint coverage, gaps in cabinetry, that every power point and tap works.
- Keep a defects list — a written, dated list of anything that isn’t right, with photos. Share it with the tradesperson and agree on fix dates.
- Don’t make final stage payments until that stage’s defects are fixed. This is your leverage; once the money is paid, getting someone back is much harder.
If you’re not confident spotting defects, consider hiring an independent building inspector for key stages (frame, waterproofing, pre-handover). A few hundred dollars of inspection can save thousands in rework.
14. Final Walkthrough and Handover
When the last trade packs up, the job isn’t quite done. The final walkthrough is your last formal chance to get everything right.
- Walk every room with the builder or lead tradesperson, testing everything: taps, toilets, lights, switches, doors, windows, appliances, hot water.
- Work through your defects list — every item should be fixed or have an agreed fix date before you sign off.
- Collect all warranties, manuals, compliance certificates (electrical, plumbing, waterproofing, glazing) and the asbestos clearance certificate in one folder. You’ll need these for insurance, future sales and warranty claims.
- Confirm the final payment only once you’re satisfied — and keep a small retention (5–10%) for a few weeks if your contract allows it, in case issues surface once you’re living with the work.
- Update your home insurance to reflect the renovated value, and keep all receipts — renovation costs form part of your property’s cost base for capital gains purposes.
Project Timelines by Scope
How long will your renovation take? It depends on scope, approvals, trade availability and how decisively you make decisions. As a rough industry estimate:
| Scope | Typical timeline | Notes |
| Cosmetic refresh (paint, floors, fixtures) | 4–8 weeks | Fastest; minimal approvals needed |
| Single room (kitchen or bathroom) | 6–12 weeks | Custom joinery and stone benchtops add lead time |
| Multiple rooms | 3–6 months | Sequencing trades across rooms takes coordination |
| Whole house (no structural changes) | 4–8 months | Approvals usually straightforward |
| Whole house (structural / extensions) | 6–12 months | DA approvals alone can take months |
These timelines assume decisions are made promptly. The single biggest cause of delays isn’t trades or materials — it’s homeowners taking three weeks to choose tiles. Make your selections before demolition starts, order long-lead items (stone, custom joinery, imported tapware) early, and your timeline has a fighting chance.
Frequently Asked Questions
How much does it cost to renovate a house in Australia?
Industry estimates from the Housing Industry Association put the average Australian renovation at around $63,500, but the range is enormous. A cosmetic refresh might cost $20,000–$50,000, a single kitchen or bathroom typically runs $25,000–$60,000+, and whole-house renovations generally fall between $2,500 and $5,000 per square metre. Always add a 10–15% contingency on top of your quoted costs, because hidden issues like water damage, termites or asbestos are common in Australian homes.
Do I need council approval to renovate my house in Australia?
It depends on the scope. Cosmetic work like painting, new flooring and like-for-like kitchen or bathroom replacements usually needs no approval. Internal structural changes may qualify for the faster complying development (CDC) path through a private certifier. Anything that changes the building’s footprint, height or street appearance — extensions, second storeys, significant structural work — typically requires a full Development Application (DA) from council, which can take three to six months. Always check with your council or a certifier before starting.
How do I check if my house has asbestos before renovating?
If your home was built before 1990, engage a NATA-accredited asbestos assessor to take samples and have them laboratory tested before any demolition begins. If asbestos is found, only a licensed asbestos removalist may remove it, and they must issue a clearance certificate afterwards. Never attempt DIY asbestos removal — the health risks are severe and the fines for illegal handling are substantial across all Australian states.
Should I hire a builder or manage the trades myself?
Hiring a builder or project manager costs more but gives you a single point of accountability, coordinated scheduling and someone who knows the correct trade sequence. Managing trades yourself (owner-builder style) can save the builder’s margin — typically 15–25% — but it demands serious time, organisation and construction knowledge, and in some states you need an owner-builder permit for larger jobs. If this is your first renovation, a builder is usually the safer choice.
How long does a full house renovation take in Australia?
A cosmetic refresh typically takes 4–8 weeks, a single room 6–12 weeks, and a whole-house renovation 4–12 months depending on whether structural work and DA approvals are involved. The biggest wildcard is decision-making: delays in choosing finishes and fixtures stall trades more than almost anything else. Finalise all selections before demolition starts and order long-lead items early to protect your timeline.
Finished your renovation? Share your journey on Show Your Space — inspire others with your before-and-after photos.