
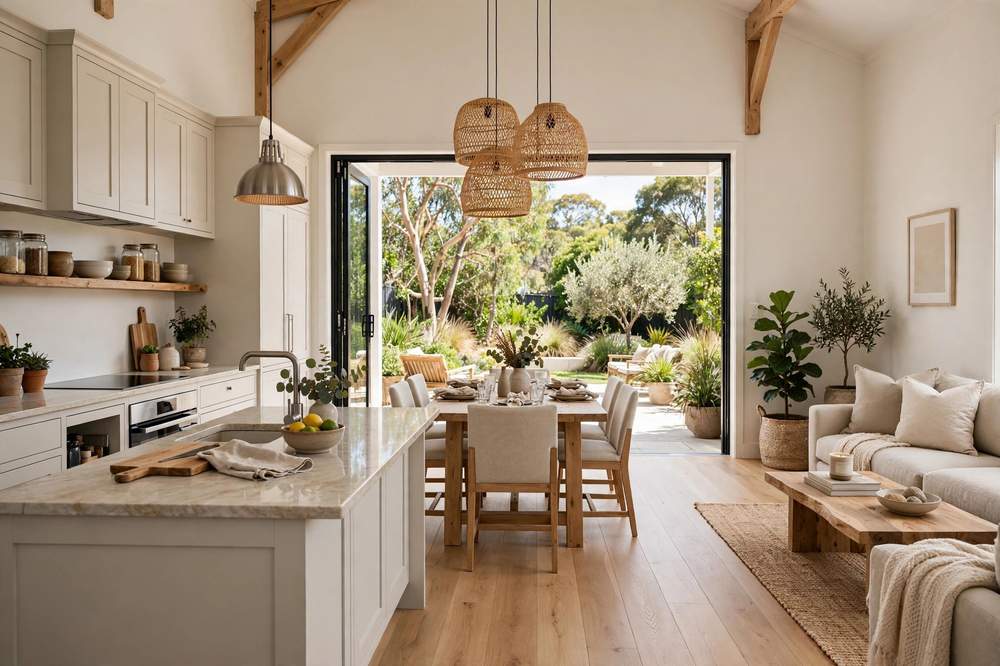
Open plan living has been the default in Australian homes for decades, but the way we do it is changing. If you’re looking for open plan living ideas Australia homeowners are embracing in 2026, the shift is clear: less one giant echoing room, more cleverly zoned spaces that keep the light and flow while giving cooking, eating, working and relaxing each their own defined territory.
The post-pandemic years taught us that fully open spaces can feel chaotic when the house doubles as an office, a classroom and a gym. The 2026 answer isn’t to rebuild all the walls — it’s flexible zoning: sliding panels, furniture placement, lighting and level changes that let you open things up for entertaining and close them down for everyday life. This guide covers ten ideas that work, plus honest Australian costs for opening up a floor plan.
Why open plan still works in 2026 (with a twist)
Australian homes suit open plan living naturally — long days, outdoor entertaining and family life that drifts between kitchen and living room. In 2026 the trend is “zoned living”: the connection stays, but each zone gets its own identity. Builders and designers report strong demand for floor plans where families can be together without being on top of each other, with noise separation between active and quiet areas and dedicated spots for home offices.
Before committing to a layout, it helps to know your style direction. Our interior design style quiz can clarify whether you lean modern, coastal, classic or somewhere in between — which shapes every zoning decision below.
10 open plan living ideas for Australian homes
1. Zone with rugs and furniture, not walls
The simplest zoning tool is also the cheapest. A large rug under the lounge setting visually anchors it as its own zone, while the dining table on bare floorboards or tiles reads as a separate area — no construction required.
Size matters: the rug should be big enough that the front legs of the sofa and chairs all sit on it. In an open space, one oversized rug beats three small ones, which chop the room up. Face the sofa’s back toward the dining zone to create a natural boundary.
Best for: rentals and anyone wanting a no-renovation refresh.
Approximate budget: $500–$2,500 for a large quality rug.
2. Use the kitchen island as the divider
A well-placed island bench does double duty: extra prep space and a natural barrier between kitchen and living zones. In 2026, islands are getting deeper — 900mm to 1.2m — with waterfall ends, integrated dining overhangs and charging points for laptops and phones.
Position the island parallel to the living area so the working side faces the kitchen and the seating side faces the lounge. Pendant lights above the island then signal “kitchen zone” from across the room.
Best for: kitchen-living combos in new builds and renovations.
Approximate budget: $3,000–$10,000 for the island joinery, depending on stone and size.
3. Add sliding doors or pocket doors for flexible privacy
The defining 2026 move: keep the open plan, but add the option to close it. Timber or fluted-glass sliding doors between the kitchen and living area let you shut out cooking smells and noise, or open everything up when entertaining.
Pocket doors that disappear into the wall are the premium option; barn-style sliders on a visible track are cheaper and suit industrial or farmhouse looks. Fluted or reeded glass panels are popular because they borrow light while blocking views.
Best for: home offices within open plans, kitchens that open to entertaining areas.
Approximate budget: $1,500–$5,000 per opening, depending on door style and whether the wall needs reframing.
4. Divide with open shelving or bookcases
A double-sided open bookcase is a room divider that stores things and displays things at the same time. Positioned between the lounge and dining zones, it breaks up the sightline just enough to make each area feel distinct while keeping light flowing through.
Style it with books, ceramics and a few plants — avoid cramming every shelf, or it becomes a wall. Backless units work best; if you need more substance, a low credenza (around 900mm high) divides without blocking light at all.
Best for: renters, apartments and anyone who likes to rearrange.
Approximate budget: $300–$2,000 for the shelving unit.
5. Open the back wall to the alfresco
In Australia, true open plan living extends outdoors. Replacing a standard sliding door with stacker or bi-fold doors that open the full width of the living area merges the lounge with the deck or patio — effectively doubling your entertaining space in summer.
Match the indoor and outdoor flooring tones (or run the same tiles through) for a seamless transition, and continue the ceiling line or add an outdoor pendant over the alfresco dining spot to tie the zones together.
Best for: homes with usable backyards; entertaining-focused families.
Approximate budget: $8,000–$20,000 for quality stacker/bifold doors installed, plus any structural work to widen the opening.
6. Run consistent flooring through the whole space
Nothing breaks open plan flow faster than flooring that changes at every doorway. Running one material — wide-plank engineered timber, large-format tiles or polished concrete — through kitchen, dining and living areas makes the whole footprint read as one generous space.
If a full re-floor is too much, unify with consistent rugs and paint tones. Where wet areas need different flooring, use a flush transition strip rather than a raised threshold to keep the flow.
Best for: making smaller open plans feel significantly bigger.
Approximate budget: $100–$250 per square metre installed for engineered timber; $80–$180 for large-format tiles.
7. Layer lighting to define each zone
One central ceiling light flattens an open plan into a single boring room. Instead, give each zone its own lighting story: pendants over the island and dining table, floor lamps and wall lights in the lounge, and dimmable downlights overall.
Warm white (2700–3000K) keeps living areas cosy. In 2026, statement pendants — rattan, alabaster-look or sculptural metal — are doing heavy lifting as the visual anchor of each zone. Put zones on separate switches or smart controls so you can light just the area you’re using.
Best for: evening atmosphere; homes where zones need to feel distinct after dark.
Approximate budget: $2,000–$6,000 for a layered lighting package with an electrician.
8. Build in a banquette dining nook
A built-in banquette (bench seating) along one wall turns the dining zone into a destination rather than an afterthought. It saves floor space compared to chairs on all sides, adds hidden storage under the seat, and gives kids and guests a spot they naturally gravitate to.
Upholster the bench in a wipeable fabric or leather-look vinyl for family practicality, and hang a pendant or artwork above to mark the zone. A round or oval table softens the built-in lines.
Best for: family kitchens, smaller open plans, breakfast nooks.
Approximate budget: $2,000–$5,000 for custom banquette joinery.
9. Soften acoustics with textiles and panelling
The biggest complaint about open plan living is noise — hard surfaces bounce sound around, and the TV competes with the dishwasher. The fix is softness: rugs, upholstered furniture, curtains instead of blinds, and acoustic wall panelling or slatted timber features on one wall.
Even modest changes help noticeably. A rug, curtains and an upholstered sofa absorb far more sound than bare floors and leather. If you’re renovating, consider acoustic insulation in the ceiling above the living zone.
Best for: families with kids, homes with hard floors, anyone working from the living area.
Approximate budget: $500–$3,000 depending on how far you go.
10. Create a defined entry or reading nook
Open plans often lack a sense of arrival — you walk straight from the front door into the lounge. Carving out a small entry zone with a console, mirror and rug, or a reading nook with an armchair and floor lamp in a quiet corner, gives the big space human-scale moments.
These micro-zones are what separate a well-designed open plan from an empty-feeling one. They cost little but make the home feel considered and personal.
Best for: large open plans that feel cavernous; adding character cheaply.
Approximate budget: $300–$1,500.
What does it cost to open up a floor plan in Australia?
If your home isn’t open plan yet, creating it usually means removing a wall — and the cost depends entirely on what kind of wall it is:
- Non-load-bearing wall removal: industry estimates put a straightforward internal wall removal at roughly $2,000–$5,000, including demolition, patching, painting and flooring repairs.
- Load-bearing wall removal: expect $5,000–$15,000+, because it needs a structural engineer’s design, a support beam (often steel), and sometimes temporary propping during the work. Always get an engineer — never guess.
- Full living-area refresh: a living room renovation involving wall removal, new flooring and paint typically runs $20,000–$45,000, based on published Australian renovation cost guides.
Load-bearing walls require proper engineering and, in most states, council approval or a building permit. The Housing Industry Association is a good starting point for finding licensed builders and understanding renovation contracts. For a detailed room-by-room breakdown, see our renovation costs Australia 2026 guide, and run the numbers with our renovation tools.
Practical tips for great open plan living
- Keep sightlines clean. The eye should travel through the space without hitting clutter — open plans punish mess, so plan generous concealed storage.
- Repeat materials and colours across zones (same timber, same black tapware, same pendant family) for cohesion.
- Plan power and data early. Open plans need floor outlets and well-placed points for lamps and devices — retrofitting them later is expensive.
- Think about heating and cooling. Larger open volumes need appropriately sized systems; zone your air conditioning if possible so you’re not cooling the whole space for one person.
- Don’t forget window coverings. Big glass walls need sheer curtains or blinds for glare, privacy and heat control in Australian summers.
Frequently asked questions
How much does it cost to knock down a wall in Australia?
Removing a non-load-bearing internal wall typically costs $2,000-$5,000 including demolition, patching and painting. Removing a load-bearing wall costs $5,000-$15,000 or more because it requires a structural engineer’s design, a steel support beam and usually a building permit. Always confirm with a licensed builder and engineer before touching any wall.
Is open plan living still popular in Australia in 2026?
Yes, but it’s evolving. Pure open sprawl is giving way to “zoned” open plan living — connected spaces with defined areas for cooking, dining, relaxing and working. Flexible elements like sliding doors, pocket doors and furniture zoning let homeowners open things up for entertaining and close them down for privacy.
How do you zone an open plan living area without building walls?
Use rugs to anchor the lounge zone, position the sofa back toward the dining area as a boundary, add a kitchen island as a divider, install open shelving or bookcases as see-through partitions, layer separate lighting for each zone, and use sliding or pocket doors where you want the option of closing a space off.
How do you reduce noise in an open plan home?
Soften hard surfaces: add large rugs, upholstered furniture, curtains instead of blinds, and consider slatted timber acoustic panelling on one wall. Separating noisy zones (kitchen, kids’ play area) from quiet ones (reading nook, home office) with distance or sliding doors also helps significantly.
Do I need council approval to remove a wall?
It depends on the wall and your state. Removing a load-bearing wall almost always requires engineering certification and a building permit, while removing a simple non-structural partition may not. Rules vary between councils, so check with your local council or a licensed builder before starting — proceeding without required approval can cause major problems when selling.