
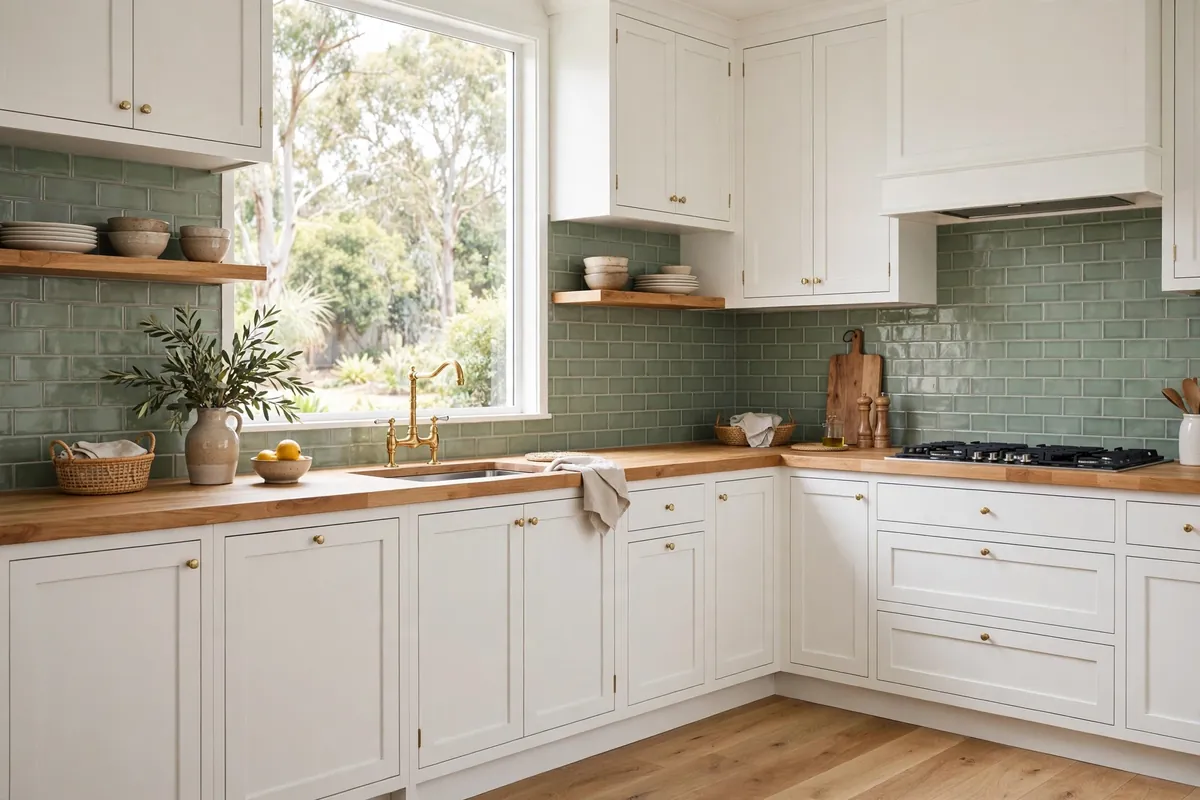
The splashback is the jewellery of your kitchen — a relatively small area with outsized visual impact. Get it right and the whole kitchen lifts. Get it wrong and you’ll notice it every single day. Here’s how to choose the right splashback material for your Australian kitchen, with honest 2026 prices.
Kitchen Splashback Costs in Australia
Splashback pricing has two parts: material supply and installation. Costs below are per square metre, based on a typical 3m² splashback zone (600mm high × 5m long):
| Material | Supply (per m²) | Install (per m²) | Total (3m²) |
|---|---|---|---|
| Subway/ceramic tiles | $30–$120 | $50–$100 | $390–$960 |
| Large-format porcelain | $60–$200 | $80–$130 | $420–$990 |
| Glass (toughened) | Installed price | $900–$1,800 | |
| Engineered stone | $150–$400 | $100–$200 | $750–$1,800 |
| Pressed tin | $80–$180 | DIY | $240–$540 |
| Peel-and-stick | $20–$80 | DIY | $60–$240 |
Tiled Splashbacks
Tiles remain the most popular splashback choice in Australia — affordable, endlessly varied, and any competent tiler can install them.
Subway Tiles
The safe classic. White subway tiles suit almost any kitchen and cost as little as $20–$30/m². For more character, try handmade-look subway tiles ($60–$120/m²) with irregular edges and glaze variation. Run them vertically or in herringbone for a modern twist on the classic.
Large-Format Porcelain
Fewer grout lines = easier cleaning and a more seamless look. Large-format tiles (600×1200mm) work beautifully in contemporary kitchens. Heavier and trickier to install, so budget for skilled labour.
Mosaics and Feature Tiles
Use sparingly — a strip of mosaic or patterned encaustic-look tiles as an accent, with plain tiles elsewhere. Full mosaic splashbacks are expensive to buy and install, and can date quickly.
Glass Splashbacks
Toughened glass splashbacks deliver a sleek, seamless, grout-free surface that’s dead easy to wipe clean. Available in any Dulux colour, back-painted for depth.
- Cost: $250–$450/m² installed (standard colours); custom colours and low-iron (ultra-clear) glass cost more
- Pros: No grout, hygienic, reflective (makes small kitchens feel bigger), huge colour range
- Cons: Shows every fingerprint and splash; needs frequent wiping; must be toughened glass behind gas cooktops
- Best for: Modern kitchens, small spaces that need visual expansion
Stone Splashbacks
Running your benchtop stone up the wall as a full-height splashback is the signature look of premium Australian kitchens in 2026.
- Engineered stone (Caesarstone, Quantum Quartz): $150–$400/m² supply. Consistent pattern, non-porous, easy care.
- Natural marble: $250–$800/m² supply. Unmatched beauty, but porous — seal it and accept some patina over time.
- Porcelain slabs: $300–$600/m². Ultra-hard, heat-proof, and available in dramatic marble looks without the maintenance.
Full-height stone works best when it matches or complements the benchtop. The visual continuity makes even modest kitchens feel luxurious. For benchtop-adjacent inspiration, see our kitchen island design ideas guide.
Budget and DIY Options
Pressed Tin
A heritage favourite that’s having a revival. Pressed tin panels ($80–$180 per sheet) glue straight to the wall — genuinely DIY-friendly. Paint in any colour. Just check fire regulations behind gas cooktops.
Laminate Hardboard
Around $60–$100/m², available in hundreds of patterns including convincing stone and timber looks. Fine behind electric cooktops; needs a non-combustible backing panel behind gas.
Peel-and-Stick Tiles
The renter’s friend. $20–$80/m², no tools needed, removes cleanly. Won’t fool anyone up close, but transforms a tired rental kitchen for under $200.
Gas Cooktop Safety Rules
This matters: Australian standards require specific clearances and non-combustible materials behind gas cooktops. As a rule of thumb:
- Safe without extra backing: Tiles, toughened glass, stainless steel, stone, pressed tin
- Needs non-combustible backing: Laminate, acrylic, peel-and-stick, timber-look panels
- Minimum clearance: Usually 600mm from cooktop to rangehood, but check your cooktop manufacturer’s specs — they override general rules
When in doubt, ask your installer. Getting this wrong can void your home insurance.
What’s Trending in 2026
- Warm neutrals: The cool-grey era is over. Warm whites, creams, sage green and greige dominate.
- Fluted and ribbed tiles: Vertical ribbing adds texture and shadow play, especially in white.
- Full-height stone: Benchtop material continued up the full wall — the luxury standard.
- Coloured grout: Dark charcoal grout with white tiles for bold graphic definition.
- Handmade-look tiles: Imperfect edges and glaze variation — a reaction against mass-produced uniformity.
Cleaning and Maintaining Your Splashback
Daily: a quick wipe with a damp microfibre cloth keeps most splashbacks pristine. Weekly: warm water with a drop of dish soap for grease buildup near the cooktop. For glass, a 50/50 water-vinegar spray cuts through haze without streaking. Avoid abrasive scourers on glass, acrylic and pressed tin — they scratch. Re-seal grout lines yearly in high-splash zones. Natural stone splashbacks benefit from an annual stone sealer application. The golden rule: wipe spills when they happen. Baked-on turmeric and tomato splatter are the enemies of every splashback material.
Splashback Height and Coverage: How Much Do You Need?
Standard splashback height in Australia is 600mm from benchtop to the underside of overhead cupboards. But that’s just the starting point.
- Standard 600mm: Covers the main splash zone behind the cooktop and sink. Most cost-effective — a typical kitchen needs just 3m².
- Full height to ceiling: Dramatic and luxurious, especially in stone or large-format tile. Doubles material cost but eliminates the awkward line where splashback meets paint.
- Behind open shelving: If you have open shelves instead of overheads, run the splashback full height behind them for a cohesive look.
- Window splashbacks: Some kitchens have windows behind the sink — no splashback needed there, but ensure the window frame is moisture-resistant.
Measure carefully: length × height = m², then add 10% wastage for tiles (15% for herringbone or complex patterns). For a standard 600mm × 5m run, that’s 3m² + wastage = order 3.3m² of tile.
FAQs
What is the cheapest splashback option in Australia?
Peel-and-stick tiles ($60–$240 for a typical 3m² zone, DIY) are cheapest, followed by standard ceramic subway tiles professionally installed ($390–$960). Pressed tin is the best-value permanent option at $240–$540 DIY.
Are glass splashbacks worth the money?
If you value a seamless, grout-free surface and easy cleaning, yes. At $900–$1,800 for a typical kitchen, they’re mid-range in price. The downside is they show fingerprints and need frequent wiping — not ideal if you hate cleaning.
Can I use laminate splashback behind a gas cooktop?
Only with a non-combustible backing panel installed to the manufacturer’s specifications. Tiles, glass, stone and stainless steel are inherently safe behind gas cooktops.
How high should a kitchen splashback be?
Standard is 600mm from benchtop to overhead cupboards. Full-height splashbacks (benchtop to ceiling) are increasingly popular and make a strong design statement, especially in stone.
Should the splashback match the benchtop?
It doesn’t have to, but coordination matters. Matching stone creates a luxurious seamless look. Contrasting (e.g. dark benchtop, light splashback) adds visual interest. The key rule: pick one hero — if the benchtop is dramatic, keep the splashback quiet, and vice versa.