
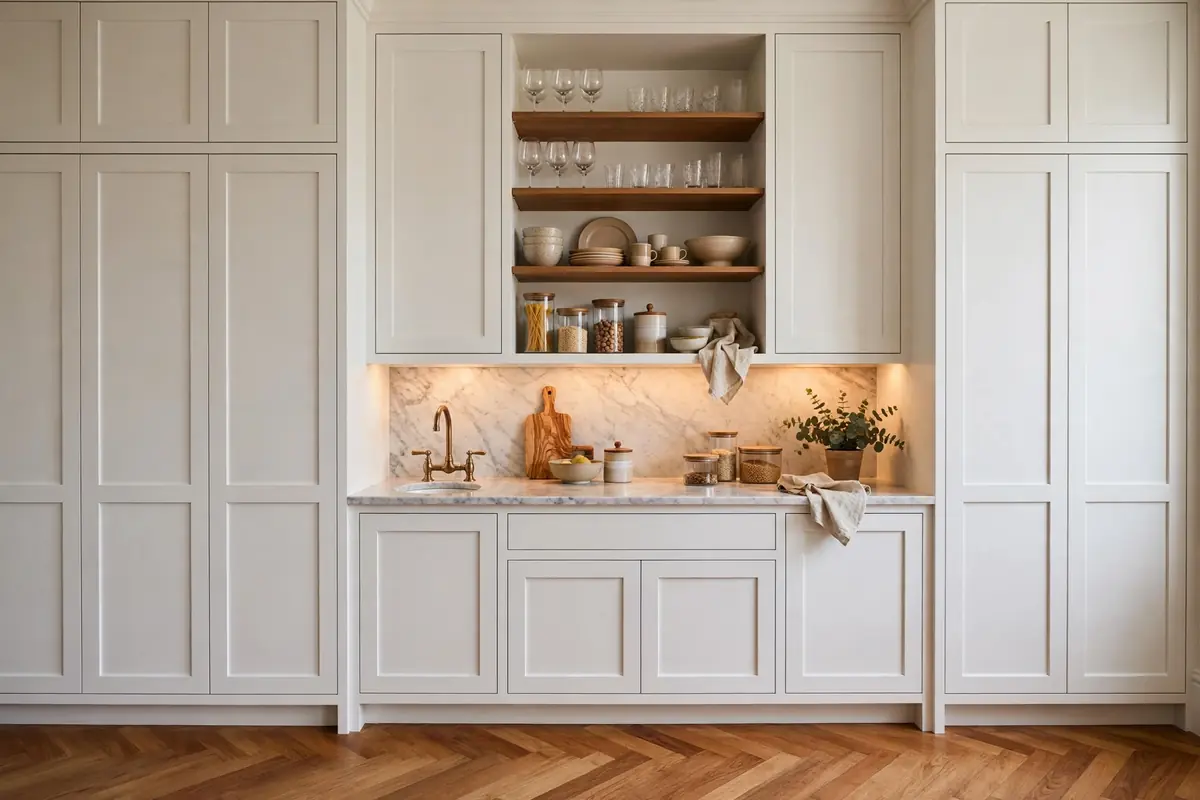
The butler’s pantry has gone from period-home relic to renovation must-have in barely a decade — and Australian builders now offer one in everything from entry-level house-and-land packages to architect-designed new builds. The idea is simple: hide the mess (appliances, prep, dirty dishes) behind a door while the main kitchen stays camera-ready for open-plan living.
Short answer: A workable butler’s pantry needs a 900–1000mm walkway clearance between benches, roughly 600mm-deep bench tops, and a layout that suits the space — straight (one-wall), galley or L-shape. Even a small pantry can start from about 2 metres long. As a rule of thumb, adding a butler’s pantry in a renovation costs around 30–50% of the original kitchen cost — though one Australian source quotes a small add-on from about $2,000 (indicative only; flag it and get itemised quotes). The difference between a pantry you love and a pantry you ignore is dimensions, storage engineering and ventilation — not square metres.
Dimensions below reflect common Australian residential practice; cost figures are indicative 2026 numbers from a single published Australian source unless noted. Always confirm with your designer or builder.
Why a butler’s pantry — and when to skip one
The honest case for a butler’s pantry: open-plan living means the kitchen is always on display. A second workspace absorbs the ugly half of cooking — the stand mixer, the air fryer, the half-loaded dishwasher, the mountain of prep bowls — so the island can stay clear. It also centralises bulk storage, a second fridge or freezer, and the small appliances that clutter bench space.
But it is not free, and not always worth it. Skip or shrink the pantry when: you are working with a tight floorplan and the pantry steals space from the living area or bedrooms; your kitchen is already generous and well-storied; or you rarely cook — a pantry rewards people who prep, preserve and entertain. The worst outcome is a dark, narrow cupboard you walk past to reach the main kitchen: if you cannot fit proper clearances, do not force it.
The other question is resale. In 2026, buyers recognise a butler’s pantry and pay for one in the right price bracket — but a cramped, poorly lit one adds nothing. Build it well or build nothing.
The three layouts and the dimensions that matter
Almost every butler’s pantry is one of three shapes, and the dimensions decide everything:
Straight (one-wall): a single bench run along one wall — the simplest layout, suited to narrow spaces and small add-ons. Start from about 2 metres long; below that, you are building an oversized cupboard.
Galley: bench runs on both sides with a walkway between — the most efficient working layout, because everything is within a pivot. This is where the 900–1000mm walkway clearance matters most: 900mm is the workable minimum for one person; 1000mm+ lets two people pass comfortably. Anything less becomes a corridor of frustration.
L-shape: benches on two adjacent walls — best for corner spaces and larger pantries, giving more continuous bench and room for a second sink or dishwasher on the return.
The constants across all three: bench depth of roughly 600mm (matching standard kitchen depth, so appliances and sinks fit properly), power points planned before the plaster goes up, and a door that swings out — or a cavity slider — so the entry never steals working space.
Small-space and retrofit ideas
No room for a full pantry? A well-designed small pantry still earns its keep. Start with the honest minimum: about 2 metres of bench, a 900mm walkway, and ceiling-height storage to compensate for the small footprint. A straight one-wall layout behind a cavity sliding door can slot into a hallway wall, the back of a garage, or a converted laundry nook.
Retrofitting into an existing home is where the money hides. You need a wall to steal from, plumbing access if you want a sink, and ventilation — a pantry carved out of dead space with no window and no exhaust becomes a humidity trap. The smart move is the wet-zone combo: group the kitchen, pantry and laundry plumbing together so pipes, drainage and waterproofing share runs and trade visits, which cuts complexity and cost. If your laundry is due for work too, read our laundry renovation cost guide and plan both at once.
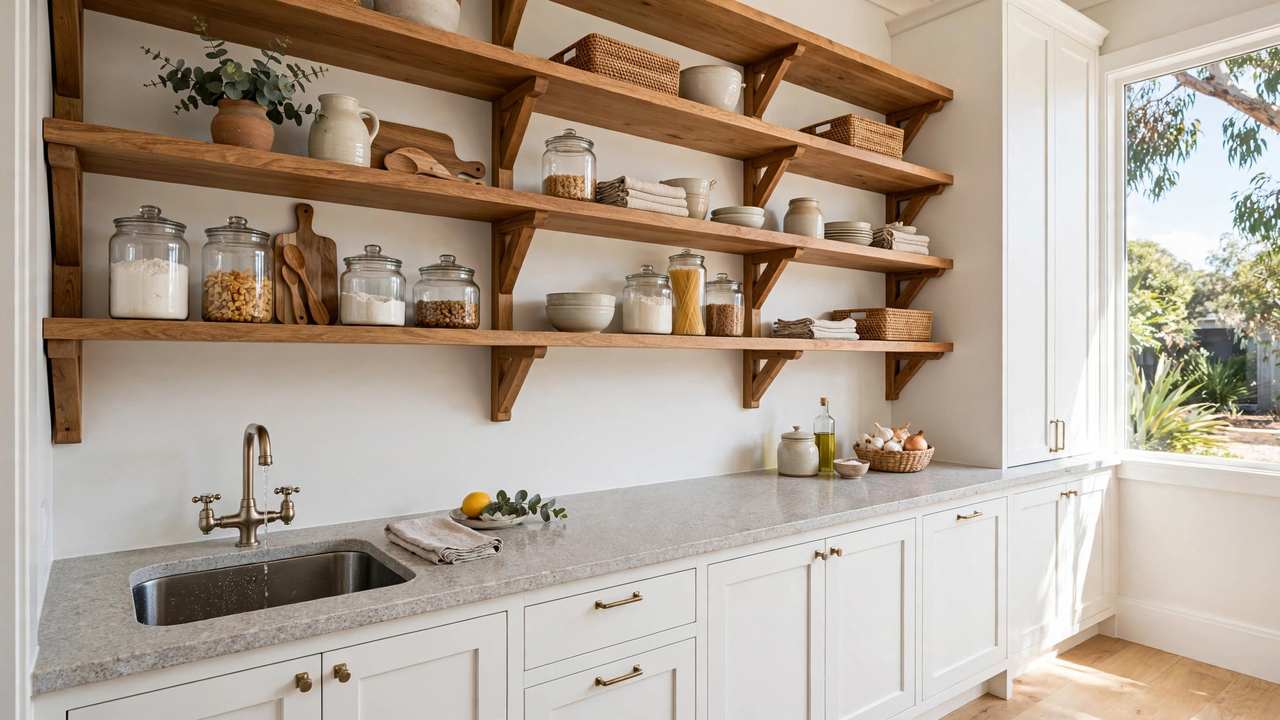
For very small pantries, consider open shelving instead of overheads on one side — it keeps the space visually light and puts daily items within reach — and a slimline pull-out pantry unit for the dead corners.
Storage engineering: drawers, larders and ceiling-height overheads
A butler’s pantry is a storage machine, so engineer it like one. The hierarchy that works:
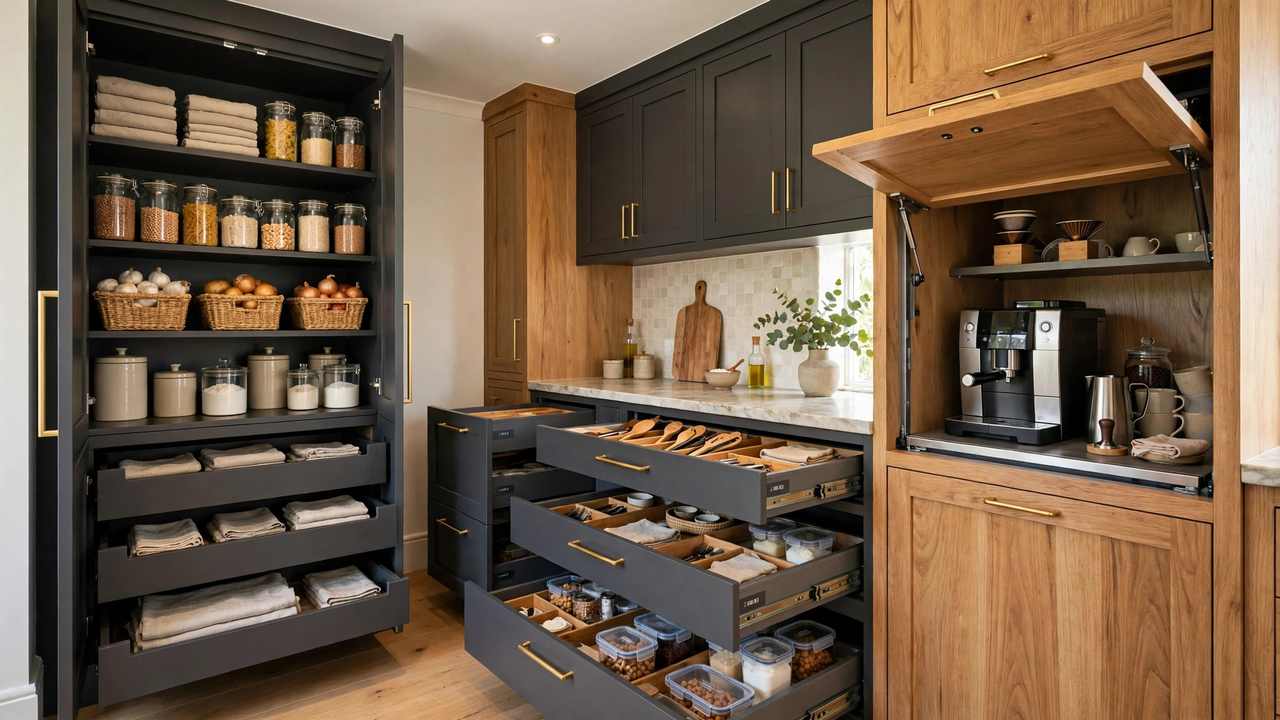
- Deep drawers over cupboards. Pots, appliances and bulk goods disappear into wide drawers where you can see everything; cupboards with fixed shelves waste the back half.
- A tall larder unit for dry goods — pull-out or door-mounted racks so nothing hides.
- Tray and chopping-board dividers in a narrow vertical cabinet — the classic wasted item that finally gets a home.
- Ceiling-height overheads for the things you use monthly, not daily: the Christmas platters, the preserving jars, the spare small appliances.
- An appliance garage — a benchtop-depth cupboard with a lift-up or pocket door that swallows the kettle, toaster and coffee machine. It needs concealed power points and ventilation (a vented back or gap), or heat builds up behind closed doors.
Measure your tallest appliance before finalising shelf heights — the Thermomix, the stand mixer with its bowl, the air fryer — because a pantry that does not fit your actual appliances is just expensive shelving. And label nothing permanently: needs change, and adjustable shelving outlives fixed layouts.
The second sink and dishwasher: plumbing notes
A second sink is the feature that separates a storage room from a working pantry: rinse veg, fill pots, hide the soaking roasting pan. But plumbing is the expensive part of any pantry add. A sink needs water supply, drainage and waterproofing; a dishwasher needs the same plus power and a waste connection.
Keep both within sensible distance of the main kitchen’s plumbing — long pipe runs through slabs or across the house are where the quote balloons. This is another argument for the wet-zone approach: if the pantry backs onto the kitchen or laundry wall, the plumber connects to existing runs instead of cutting new ones. Confirm early whether your slab allows new drainage penetrations — post-tensioned slabs in particular can make new drains difficult or impossible.
One honest caveat: a second dishwasher is a luxury, not a necessity. If the budget is tight, plumb the space for one (pipes and power are cheap during the build) and add the appliance later.
Appliances, lighting and ventilation
Appliance placement follows the workflow: the appliances you use daily (coffee machine, kettle, toaster) live in the appliance garage near the entry; the ones you use weekly (stand mixer, food processor, slow cooker) live in drawers or on the back bench. A second fridge or a bar fridge is the classic pantry appliance — size the bay before you buy, and allow ventilation clearance per the manufacturer’s specs.
Microwave placement deserves a decision, not an afterthought: at bench height it is easy to reach but eats bench space; in a wall unit or under-bench niche it frees the bench but needs a proper trim kit and ventilation gaps. Either way, plan the power point first.
Lighting: pantries are often internal rooms with no natural light, so layer it — bright task lighting under the overheads (4000K is the practical pick for prep), plus a general ceiling light. Under-cabinet LED strips are cheap during the build and transform usability. Avoid a single dim oyster light and calling it done.
Ventilation: non-negotiable. A pantry with a dishwasher, a kettle and warm appliances generates humidity and heat with nowhere to go. A window is ideal; without one, fit an exhaust fan. Poor ventilation means musty smells, warped packaging and, over time, moisture damage to cabinetry.
Finishes that flow with the kitchen
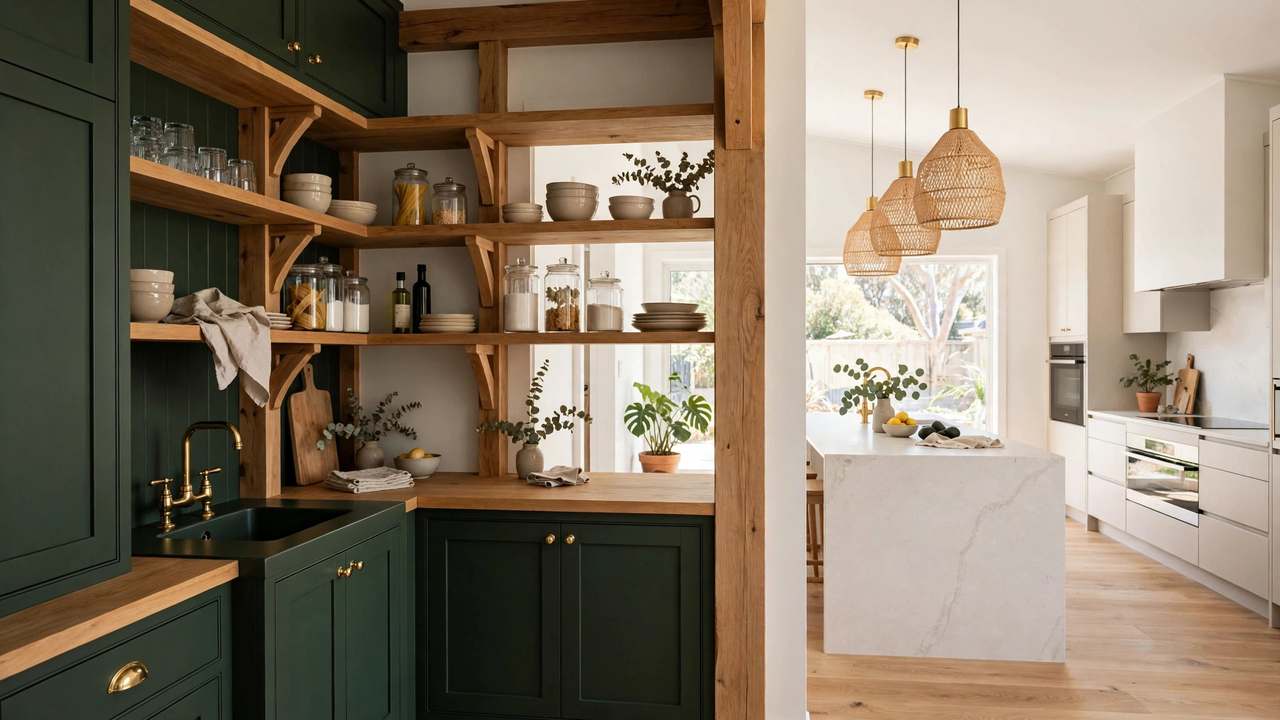
The pantry should feel like an extension of the kitchen, not a different room — but it does not need to match it exactly. The design-led approach in 2026: same flooring and ceiling for continuity, then a deliberate variation in the cabinetry — a deeper colour, a timber veneer, or open shelving against the kitchen’s closed fronts.
Benchtop choice follows workload: the pantry bench takes abuse, so pick something hard-wearing and easy to wipe. Our benchtop materials guide compares the 2026 options — laminate or porcelain are the sensible pantry picks, saving the statement stone for the island everyone sees. Splashback in the pantry can be simpler and cheaper than the main kitchen; our splashback cost guide breaks down per-m² rates.
Keep the pantry door consistent with the home’s interior doors — a mismatched door screams “afterthought” — and consider a lock if you want to hide the mess when guests arrive.
Realistic cost bands
Butler’s pantry pricing is thinly published in Australia, so treat these as indicative bands, not quotes. One Australian source suggests a small add-on can start from about $2,000 — flag that as a single-source figure and get itemised quotes. The more useful rule of thumb: budget roughly 30–50% of your original kitchen cost for the pantry, since it needs the same trades (cabinetry, electrical, plumbing if there is a sink) at a smaller scale.
What moves you up or down the band: a second sink and dishwasher (plumbing and waterproofing), stone vs laminate benchtops, the number of drawers vs cupboards (drawers cost more and are worth it), appliance garages with powered, vented doors, and whether you are stealing existing space or extending the footprint. Retrofits into post-tensioned slabs or far from existing plumbing sit at the top end.
The honest budgeting advice: price the pantry as part of the kitchen project, not after it. Trades are already on site, materials match, and you avoid a second round of disruption.
Mistakes to avoid
- Too narrow. A walkway under 900mm is a corridor, not a workspace. Measure twice.
- No ventilation. An internal pantry without a window or exhaust fan will smell of last month’s cooking.
- Forgetting power. Appliance garages, second fridges and microwaves all need points planned before plaster.
- Shelves that don’t fit your appliances. Measure the tallest item first, then set heights.
- Treating it as an afterthought. A pantry designed after the kitchen is finished inherits every compromise. Design them together.
- Skipping the door detail. A pantry without a proper door — or with a door that swings into the walkway — loses half its point.
Frequently asked questions
How wide should a butler’s pantry walkway be?
900–1000mm is the standard: 900mm is the workable minimum for one person, 1000mm+ lets two people pass comfortably. Anything narrower becomes frustrating to use.
What is the smallest practical butler’s pantry?
A small pantry can start from about 2 metres of bench in a straight one-wall layout, with a 900mm walkway and ceiling-height storage to compensate for the footprint. Below that, it functions more like an oversized cupboard.
How much does a butler’s pantry cost in Australia?
Published figures are thin. One Australian source suggests a small add-on from about $2,000 (single source — indicative only); a more useful rule is 30–50% of the original kitchen cost. Always get itemised quotes.
Does a butler’s pantry need a sink?
Not necessarily, but a sink is what makes it a working space rather than a storeroom. Keep it near the main kitchen’s plumbing to control cost, and consider plumbing the space for a dishwasher even if you add the appliance later.
How do you ventilate a butler’s pantry?
A window is ideal; without one, fit an exhaust fan. Pantries with dishwashers, kettles and warm appliances generate humidity with nowhere to go, so ventilation is non-negotiable.
Should the butler’s pantry match the kitchen?
It should flow, not match exactly. Keep the same flooring and ceiling, then vary the cabinetry deliberately — a deeper colour or timber veneer — and save the statement benchtop for the main kitchen island.
Figures & sources
Dimensions (walkway clearance 900–1000mm; bench depth ~600mm; small pantries from ~2m; straight/galley/L layouts; ceiling-height overheads; appliance garage power and ventilation; window or exhaust fan): common Australian residential design practice, 2026. Cost guidance (small add-on from ~$2,000; pantry ≈ 30–50% of original kitchen cost): single published Australian source — flagged as indicative throughout; get itemised quotes. Wet-zone plumbing approach: standard Australian renovation practice.